This will be with ink outlines and watercolor like colors.
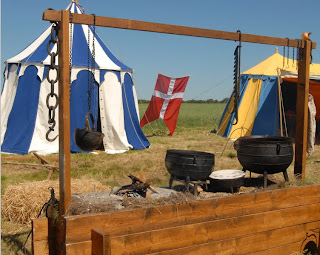
For the walkthrough I selected the photo below from a medieval re-enactment we visited in Denmark during the summer time.
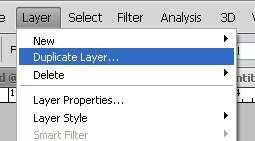
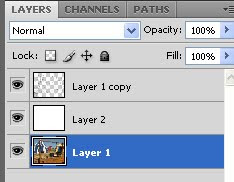
 Start out by creating a copy of the background/image layer. Either using the "Duplicate Layer..." function from the "Layer" menu or the keyboard shortcut CTRL+J.
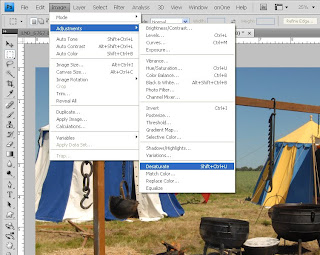
 Select the new layer and desaturate it (Image->Adjustments->Desaturate).
 This layer is to be the outline/ink layer. This could be done by tracing all the edges in the photo which will create a great result. However it will also take a long time depending on how detailed the photo is. Here is a faster way that will create good results with little effort.
 Start out by creating a copy of the background/image layer. Either using the "Duplicate Layer..." function from the "Layer" menu or the keyboard shortcut CTRL+J.
 Select the new layer and desaturate it (Image->Adjustments->Desaturate).
 This layer is to be the outline/ink layer. This could be done by tracing all the edges in the photo which will create a great result. However it will also take a long time depending on how detailed the photo is. Here is a faster way that will create good results with little effort.
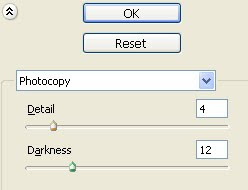
From the Filter->sketch menu select "Photocopy..."
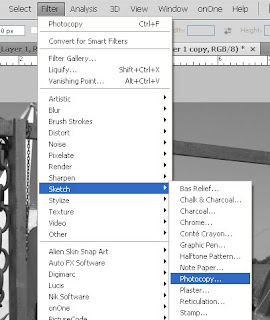 In the settings for the photocopy filter select amounts that creates outlines for your image (this may vary depending on the resolution of the photo). In most cases selecting these values will work. Detail: 4, Darkness:12.
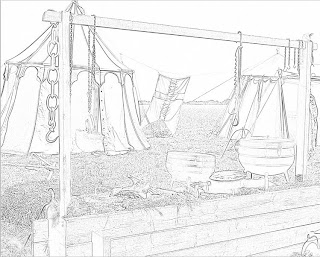
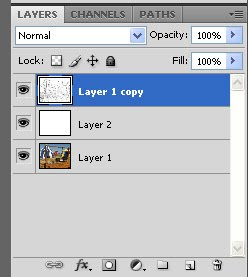
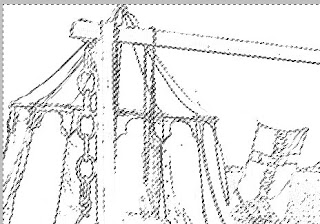
 Having applied the filter only the outlines should be visible in the photo.
 Before removing the unwanted white "filling" in the layer. Add a white layer to the layer stack (this could be black as well or you could switch between the black and white).
 In the settings for the photocopy filter select amounts that creates outlines for your image (this may vary depending on the resolution of the photo). In most cases selecting these values will work. Detail: 4, Darkness:12.
 Having applied the filter only the outlines should be visible in the photo.
 Before removing the unwanted white "filling" in the layer. Add a white layer to the layer stack (this could be black as well or you could switch between the black and white).
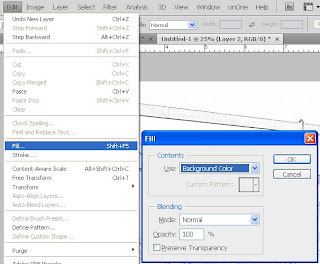
Start by selecting the bottom layer in the layers panel and add a new layer (using the button at the bottom of the layers panel or New->Layer from the Layer menu).
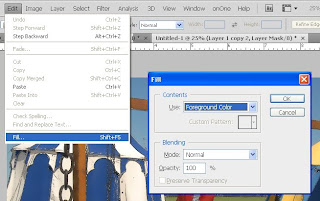
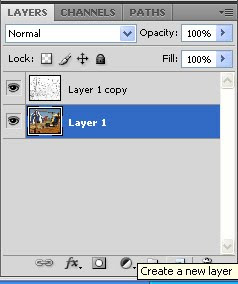 White the foreground/background colors set to default (shortcut key d). Select the new layer and fill it with the background color (white).
 Now select the outline layer (top layer) in the layer stack.
 To delete the white background in between the outlines. Select the magic wand and make sure the "Contiguous" is off (not checked).
 Click in between the outlines to make the selection. This will display the "marching ants" indicating the selected areas.
 Delete the content of the selected area (using the delete key) and notice how the background in the layer changed to indicate the now transparent areas.
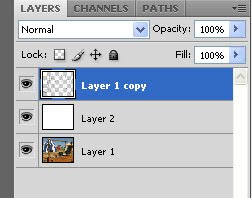 After deleting the background in the outline layer remove the selection Select->Deselect (or CTRL+D).
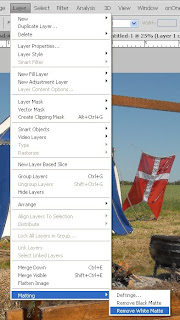
To trim the outlines and make sure all the white background is all gone. Ensure the outline layer is still selected and trim the white using Layer->Matting->Remove white matte...
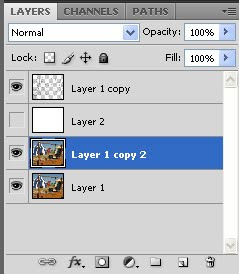
 To start coloring the image, select the photo layer at the bottom of the layer stack.
 Duplicate the layer Layer->Duplicate Layer... (or the shortcut CTRL+J).
Hide the white fill layer by clicking the eye next to the layer.
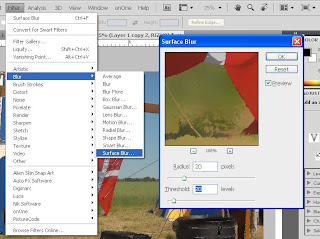
 To simplify the colors in the image, select the new painting layer (if it's not already selected) and apply a surface blur filter. Filter->Blur->Surface Blur... Settings for this may change depending on the resolution of your photo but starting out with a setting of Radius: 20 pixels andThreshold: 20 levels should do the trick in most cases
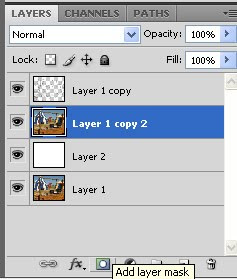
 Move the painting layer up in the layer stack by simply clicking and while holding the mouse button down, drag the layer up.
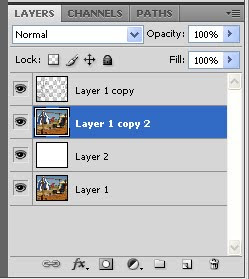 Add a layer mask to the painting layer using the "Add Layer Mask..." button at the bottom of the layer stack or the menu Layer-> Layer Mask->Hide all.
 If the mask didn't get created using the Hide all function it will be empty (showing all). Set it to hide all by selecting the layer mask and fill it with black.
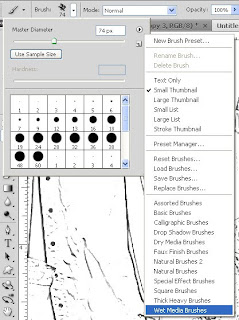
 To fill in the color with a textured watercolor look. Select the brush tool and load the wet media brushes by clicking the drop-down arrow next to the brush shape in the brush options as shown below.
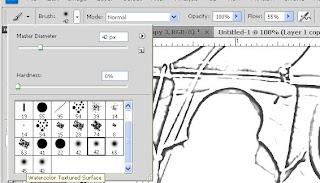
 After loading the set of brushes select a watercolor brush (or experiment with others). In this example I selected the watercolor brush with a textured surface. To better control the application of the color it is a good idea to lower the opacity and flow of the brush.
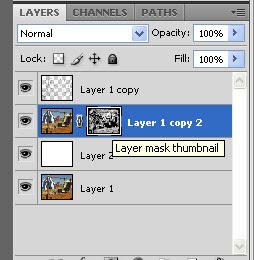
 With the mask selected in the painting layer start painting white in the areas you want color to appear. This is an area where experimentation can change a lot. Try to use different size brushes, brush lengths. Just start brushing away. If everything goes wrong it can be undone by painting with black in the layer mask or undo everything by filling the layer mask with black.
 After a good bit of brushing here is what my layer mask look like in the layer stack.
 If the outlines doesn't stand out as much as you would want them to the effect can be increased by selecting the outline layer and copying the layer (see previous).
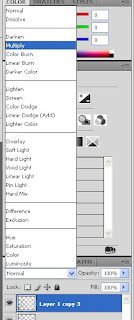
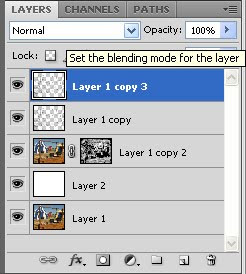 Select the new layer and change the layers blend mode to Multiply
 To start coloring the image, select the photo layer at the bottom of the layer stack.
 Duplicate the layer Layer->Duplicate Layer... (or the shortcut CTRL+J).Hide the white fill layer by clicking the eye next to the layer.
 To simplify the colors in the image, select the new painting layer (if it's not already selected) and apply a surface blur filter. Filter->Blur->Surface Blur... Settings for this may change depending on the resolution of your photo but starting out with a setting of Radius: 20 pixels andThreshold: 20 levels should do the trick in most cases
 Move the painting layer up in the layer stack by simply clicking and while holding the mouse button down, drag the layer up.
 Add a layer mask to the painting layer using the "Add Layer Mask..." button at the bottom of the layer stack or the menu Layer-> Layer Mask->Hide all.
 If the mask didn't get created using the Hide all function it will be empty (showing all). Set it to hide all by selecting the layer mask and fill it with black.
 To fill in the color with a textured watercolor look. Select the brush tool and load the wet media brushes by clicking the drop-down arrow next to the brush shape in the brush options as shown below.
 After loading the set of brushes select a watercolor brush (or experiment with others). In this example I selected the watercolor brush with a textured surface. To better control the application of the color it is a good idea to lower the opacity and flow of the brush.
 With the mask selected in the painting layer start painting white in the areas you want color to appear. This is an area where experimentation can change a lot. Try to use different size brushes, brush lengths. Just start brushing away. If everything goes wrong it can be undone by painting with black in the layer mask or undo everything by filling the layer mask with black.
 After a good bit of brushing here is what my layer mask look like in the layer stack.
 If the outlines doesn't stand out as much as you would want them to the effect can be increased by selecting the outline layer and copying the layer (see previous).
 Select the new layer and change the layers blend mode to Multiply
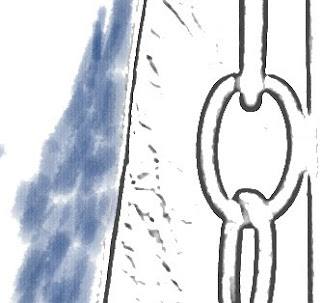
Here is the result of the painting compared to the original photo.
|  |
No comments:
Post a Comment