Now that we moved to the digital age tinting and redoing is simple, quick and painfree :-)
Tinting can be done in multiple ways. One of them which gives a little extra control is duotone (or tritone, quadtone).
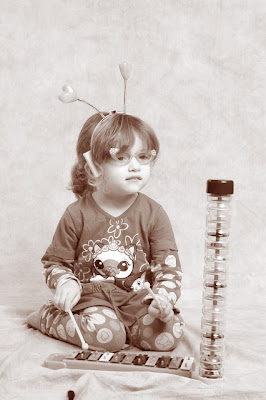
To start with select a photo to work with. I went with this one:
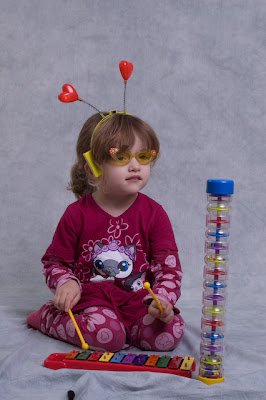
As you can see it could do with a little clarity and cleaning before we start tinting. For this see previous post describing this in detail. Doing this we end up with something like this:
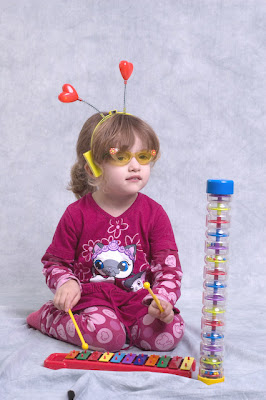
Before we can start tinting the photo it has to be converted to black and white. This can be done in multiple ways. The quick and control less method is using Desaturate function from Image->adjust menu.
Another way is using the channel mixer and if you got photoshop cs3 you can even do it by adding a black and white layer.
In this example I will use the channel mixer since adding a black and white layer in cs3 is both very similar and very simple.
From the layers palette select the channel mixer layer. Set a check mark in monochrome and depending on your photos color, brightness etc. set the values in the channel mixer settings to create a balanced black and white photo.
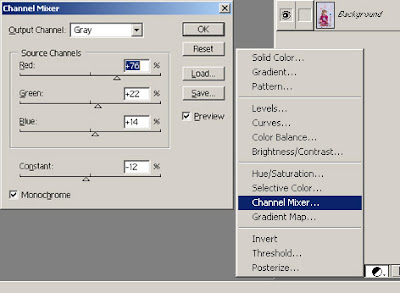
Once you have a good black and white photo (gray scale) merge all layers using the layers menu and select merge visible.
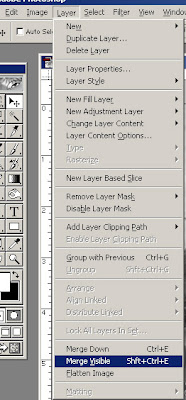
Even though the photo has the appearance of a black and white photo there is one more step. The photo may be gray scale but unless you started with a gray scale photo it is still a color photo only lacking colors.
To change the photo to a gray scale photo change the image mode in the image menu mode->Grayscale.
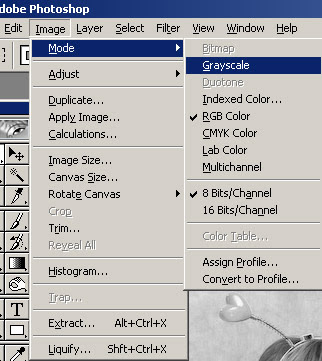
Now that we have the gray scale photo we can start tinting. I know that the new functionality offers an option for tinting the photo in the same "breath" but using this method we can tint the photo using multiple colors.
Start by changing the mode to duotone from the menu Image->mode->duotone.
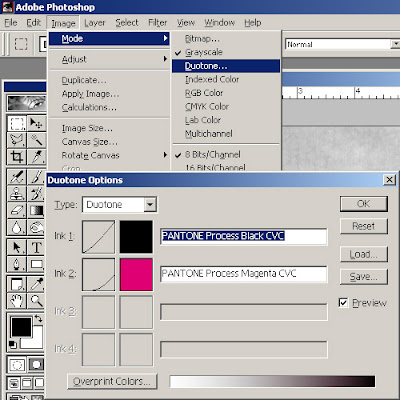
In the upper left hand corner of the dialog type can be selected and the colors to tint with can be manually selected from the boxes below that.
Another "quick" method is using the load function (button on the right hand side) and load a predefined/working color set.
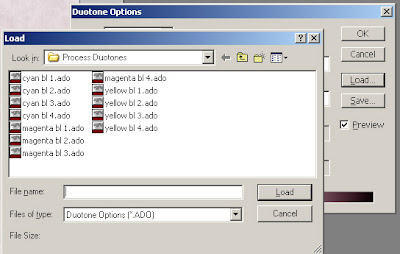
This is a good area to experiment in since you can easily load different color sets and instantly see the preview. Changing color set and look is as easy as hitting the load button and choose a new color set.
Here is a light magenta duo tone:
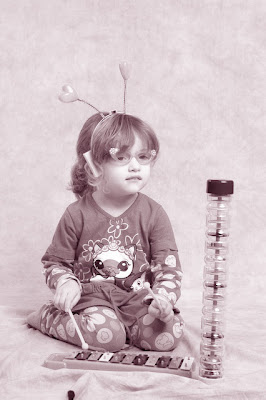
And a light brown duo tone:
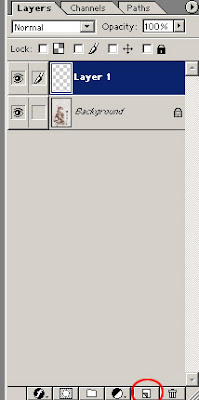
Another feature that we can add really quick to imitate some old functions is to add vignetting to the photo. Again this can be done in multiple ways but here is one way to do it.
Start by creating a new empty layer using the new layer button in the layers palette or from the layers menu.
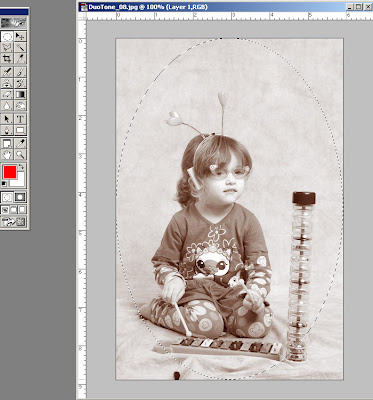
With the new empty layer selected in the layers palette. Select the Elliptical marquee tool and create a selection by clicking in the upper left corner and drag to the lower right hand corner. btw. the Elliptical marquee is grouped with the square marquee tool. You can toggle between the Elliptical marquee and square marquee using shift-M or select the one you want by right clicking the tool in the toolbox. Giving a selection like this:
Now with the selection active invert the selection (ctrl-shift-i) or selecting inverse from the select menu. Ensure the foreground color is black and fill the selection using alt-backspace or fill from the edit menu.
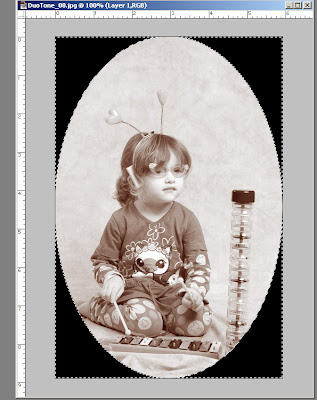
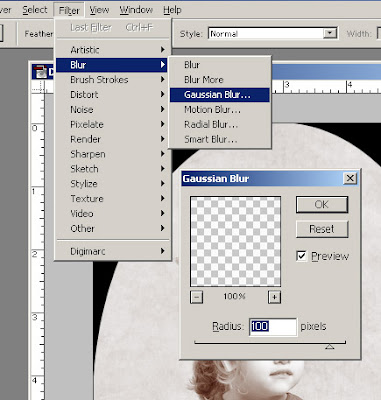
Now we have dark corners with hard edges. We would want those to be soft edges and this we can do by first blurring the edges. With the vignetting layer selected apply Gaussian blur from the filter->blur menu and select a radius around 100 pixels.
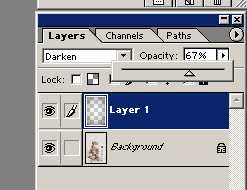
To finalize the vignetting set the blending mode to darken in the layers palette and decrease the opacity to a point where the vignetting isn't overpowering.
And here is the result:
Before: | After: |
 |  |
No comments:
Post a Comment