Starting with this image:

You may of course want to "clean" up your image first or adjust the levels as outlined in previous tutorials before getting and make a backup copy just in case you will want to undo the changes.
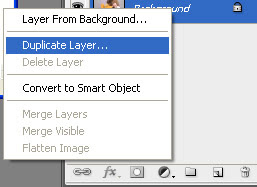
Start by selecting the background layer in the layers panel and make a duplicate layer (ctrl+j) or by right clicking the layer and select duplicate layer from the menu.
To create some nice crisp edges to work with start by sharpening the new layer you just created. ("layer 1" unless you renamed it).
Select the new layer and select sharpen->unsharp mask.. from the filter menu.
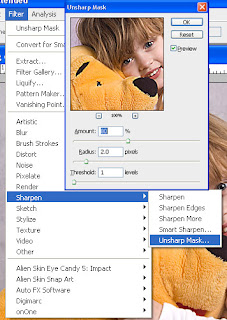
Sharpening the layer should get well defined lines in your photo which is needed for this next step.
First create a duplicate layer as above and this time you will get a layer with the default name "layer 1 copy" unless of course you renamed the layer.
From the filter menu select artistic->poster edges...
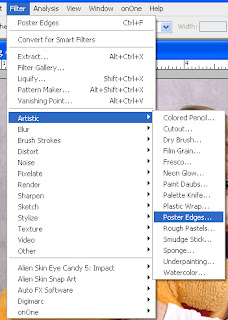
This will bring up the filter dialog (hint here you can find a lot of other interesting filter to play around with and get a preview before applying it to the layer you are working on).
In the filter dialog for poster edges adjust the sliders as shown in the next image so you get some nice generous rough black lines. It may look a bit too harsh and too much but that's ok we will get to that in a second.
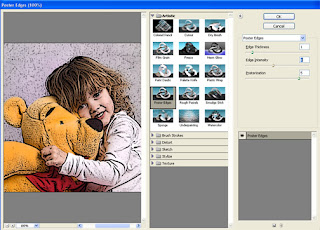
After applying the poster edges to the photo these lines may look a bit too harsh which as I mentioned is just ok. For now we can adjust the harshness by selecting the layer in the layers palette and adjust the opacity (upper right hand corner) to a setting where the effect looks just about right (which will be a little too harsh for how you want it to end up)
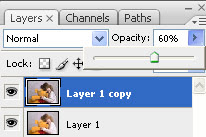
The next step can seem a little scary at first. It's kind of an old method in a new better digital version. Layer blending ... tadaaa.... It's basically somewhat equivalent to putting a transparency with lines on it up in front of your photo and it blends with the layer beneath it... pretty cool huh?
Anyway let's go to the layers palette. Select the poster edge layer (layer 1 copy) and select "pin light" from the blending list.
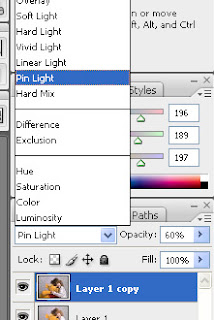
We are going to do some more layer blending so to ensure that the background which is our lowest layer we want to blend with is the right color (white in this case) we will want to create a "paper" layer at the bottom of the stack. The background layer will remain and we can keep that for reference and to avoid "destroying" the original.
To create the "paper" layer select the background layer and click the "create new layer" button at the bottom of the layers palette. This will create a new empty layer.
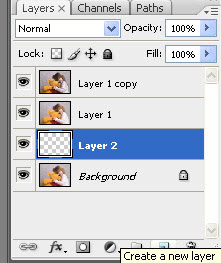
To fill the layer ensure the current colors colors are the default colors (hit d on the keyboard) and fill the layer with white. Do this either by using the shortcut ctrl+backspace or selecting fill from the edit menu. If you use the later you will get a dialog in which you must make sure to select the right color from the "Use" drop down.
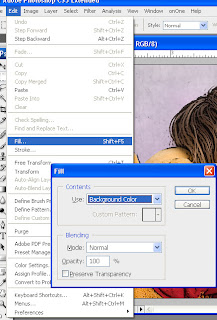
In the layers palette we now have the background layer (kept as a backup for the just in case...), a white layer, layer 1 and layer 1 copy.
To emphasize the line effect select the layer named layer 1 and decrease the opacity (in the layers palette) to a level where the colors of the photo is dimmed.
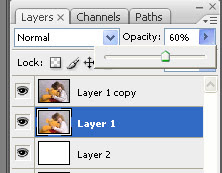
Almost there :-) starting to look right.
Depending on the chosen photo you may have some grunge/black stuff in the background which really doesn't look too good or desired.
To remove those (caused by the poster edges layer, layer 1 copy) we can mask those out of the photo.
This can be done by deleting the lines/effect we don't want or by adding a layer mask to the layer.
Start by selecting the layer (layer 1 copy) and add a mask by clicking the "add a vector mask" button at the bottom of the layers palette (it's the gray one with a white circle in the middle).
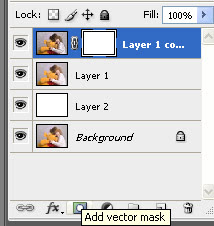
The mask is shown as a white masking layer linked with our photo in the same layer. Select the white masking layer (should be by default but... well you know).
Select the paintbrush from the toolbox and set it to a good size soft brush and foreground color black.
When painting on the mask think of it as the areas you color black will shield the effect from the photo layer and thus will not show up. So with the black brush now color the background in your photo and you will see the smudge disappear :-)
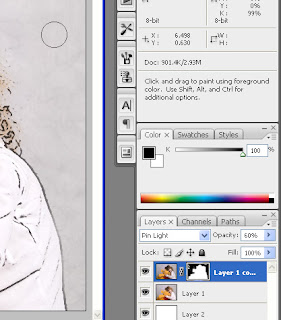
You should end up with a layer mask that has black in all the areas where you don't want the edge effect showing up.
Before finishing up you can now rename your layers by double clicking the layer name in each layer. I have renamed them so layer 1 copy is the "edge lines" and layer 1 is the "colors".
Not that the renaming is too useful right now but if you save the photo and come back to i later it might be difficult to remember what each layer is.
You can now adjust the harshness of the lines in a few easy steps.
Select the color layer and adjust the opacity to adjust the intensity of the colors. Select the edge lines layer and adjust the opacity to adjust the intensity of the lines.
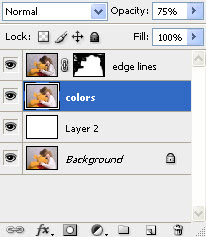
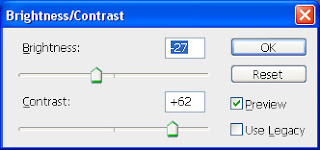
Our process may have removed some contrast and changed the brightness. This however is easy to fix by selecting the top layer and add an adjustment layer for brightness/contrast.
From the layers palette select the add adjustment layer button (the round half-white half-black one) and choose Brightness/Contrast from the menu.
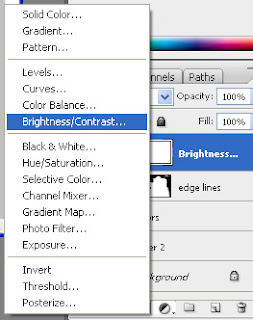
In the brightness/contrast dialog adjust the values and use the preview to set it so it suits your photo. In this case I dimmed the brightness and increased contrast but it can differ based on the starting photo.
And here is the final result:
Original:

Sketchy Lines:

No comments:
Post a Comment