Anyway that's the inspiration for this little quick tutorial. It is surprisingly easy and you can put the amount of effort in to it you wish :-)
Let's start with a photo like this:

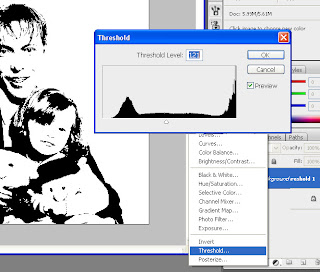
First order of business is to adjust the threshold to create a monochrome like photo. You can do this using the threshold in the image->adjust photo menu. However this will alter the pixels in your photo and once it has been applied it is for good. So instead here is how to do a non-destructive alteration.
In the layers palette select threshold from the 'add adjustment layer' menu (the half black - half white button).

In the threshold dialog slide (move) the arrow under the histogram to a point where your photo has enough black areas to create a well defined photo (i.e. you can still see what it looks like).
Now all there is left is to add some pop(ing) colors to the photo and we are done :-) well sort of.
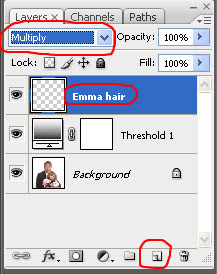
Anyway, go ahead and create a new layer. Either from the layers menu or by clicking the new layer button in the layers palette. Rename the layer to something meaningful (the color you are applying or the area you are applying it to). And finally change the layer blend mode to multiply. Changing the layer blend mode to multiply will blend the color we are painting with nicely with the background and we don't have to be too concerned about coloring outside the line.

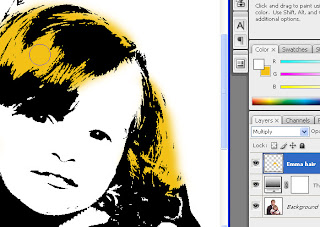
In the newly created layer start coloring with a soft brush sized to fit the area you are painting. I like using a soft brush but if you prefer a hard brush or pencil will do just as well. Here is where the blend mode is an advantage since everything colored on a black area will be "hidden".

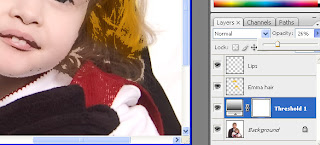
When coloring areas it can be hard to "remember" what the original image looked like or where the lines where exactly. To help hitting the correct areas you can lower the opacity of the threshold layer which will allow the photo in the background layer to >>shine<< through.
To do this select the threshold layer in the layers palette and lower the opacity using number input in the box or the slider that appears when you click the arrow next to it.

Now continue the process of creating new layers for each new area you want to color. Just like we did a couple of steps ago. For each layer remember to set the blend mode to multiply.
After a few layers with coloring we end up with the final result:
Original | Final |
 |  |
No comments:
Post a Comment