Anyway here is one that works very good for portraits in particular but I am sure it can be applied to many other photos such as scenery, landscape etc. if it seems to fit.
Here goes a step by step for Orton sandwich in photoshop.
Step 1:
Open the image you wish to try the technique on. If you wish to keep the original unaltered now would be a good time to make a duplicate of the
image (Image>Duplicate) and close the original image.
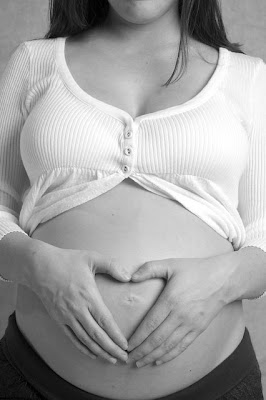
You could start out with something like this:
Step 2:
Lighten the image as follows: Image>Apply Image… In the dialog box change the blending mode to "screen and the opacity to 100%.
This will give you an appropriately overexposed image. (it's ok it's supposed to look bright and overexposed).
Here is the overexposed version of my example:

Step 3:
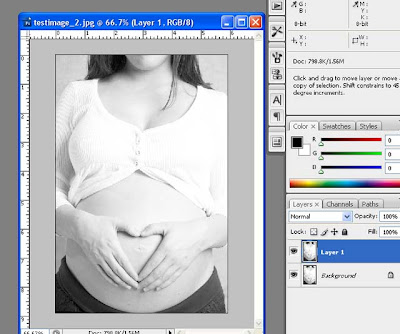
Duplicate background layer (layer>duplicate layer...) or ctrl+J in photoshop CS2/3.
you should get a layer like this (notice original is background and layer1 is our new layer):
Step 4:
Select Layer 1 and blur this layer (Filter>Blur>Gaussian Blur…
In the Gaussian blur dialog box use a Radius setting of 15 to 50 pixels – the higher the pixel setting the blurrier the photo and the more ‘painterly’ the image…
Notice you can go too far and over do it...
Experiment with different settings, for my tastes and for the size of my digital
files (5Mb in raw and ~30Mb in psd) a radius of about 25 pixels works perfect. Smaller resolution jpg could need as little as 5-10 pixels radius.
Now the photo is nice and blurry :-)

Step 5:
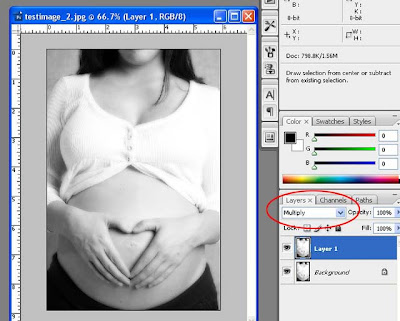
In the Layers palette select layer1 (or the blurry layer) and change the blending mode from “normal” to “multiply”.
Blending mode drop down box is highlighted here:
Step 6:
You can now "finish" off by flattening the layers using shortcut ctrl+E or selecting the layers in the layers palette, right click and select merge layers.
There, you now have an Orton image - if you like your new masterpiece save the file! Simple as that :-)
Here is my finished example:
 |  |
That's all there is too it. Have fun and remember to experiment :-)
No comments:
Post a Comment