If you want to read more of the history check it out here or why not buy a lomo camera here.
Most likely everyone have heard the slogan originating from Kodak "a Kodak moment". Well guess what. The producers of the lomo got one too... "Don't think about it". This is based on the camera being rather cheap and all you have to do is press the button. No fanzy settings or stuff like that. Just point the camera and press the button. Don't think about it ;-) kind of like that...
Here is a little tutorial on taking a photo and turning it into a Lomo version or "cheap" shot.
Start out by selecting a photo and opening it in photoshop.
Here is the one I picked to work with.
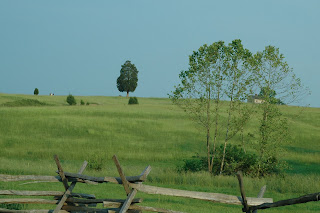
First steps are to increase contrast and saturation.
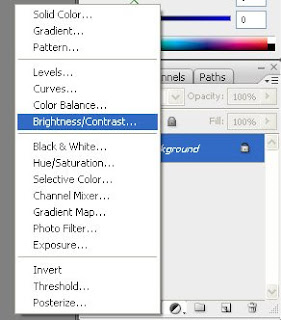
Starting out with contrast select Brightness/Contrast from the add adjustment layer button in the layer pane. Once in the dialog set the contrast value to 20 and press ok to add the layer.
 |  |
Next for saturation. Select Hue/Saturation from the add adjustment layer button in the layers pane. Once in the dialog set the saturation to 20 and click ok to add the layer.
 |  |
Next we are going to create a typical vignette as in a typical lomo photo.
Start out by selecting the elliptical marquee tool from the toolbox. If this is not immediately visible right click with the mouse on the selection tool to expand the menu.
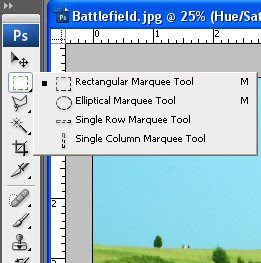
To get the vignette just right and fade out as we want it a feathering has to be applied to the selection. In this case I will use a feathering that is about a tenth of the photos shortest edge.
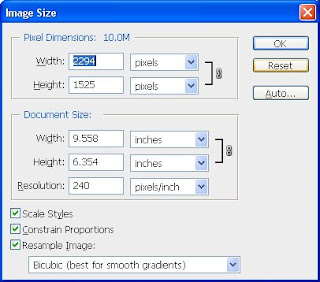
To find the size of your image select image size from the image menu. In my example the shortest edge is 1525 pixels so I will be using a feathering of 152.
Once the elliptical marquee tool is selected you can set the feathering in the options bar at the top of the screen.
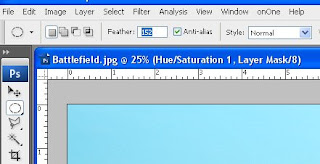
Use the marquee tool to select the center of your image. Do this by placing the cursor in one corner of the image. Hold down left mouse button and drag the selection to the opposite corner.
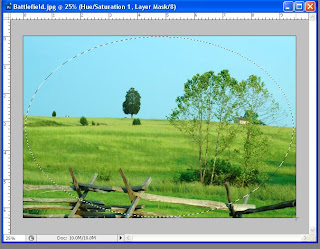
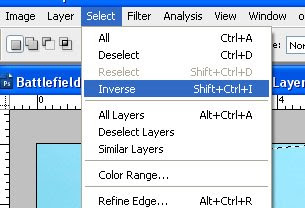
Now the center of the image is selected but that is not *really* what we wanted. Actually we wanted just the opposite but that's ok. Just use inverse from the select menu or use the keyboard Shift+Ctrl+i to inverse the selection.
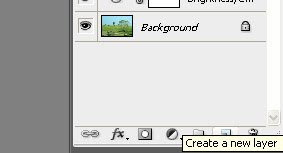
Create a new layer for the vignette using the new layer button in the layers pane.
From the Edit menu select Fill and choose black as the contents and click ok.
 |  |
Now the vignette looks sort of ok but to make it look more realistic and blend in with the photo select overlay from the blending dropdown in the layer pane.
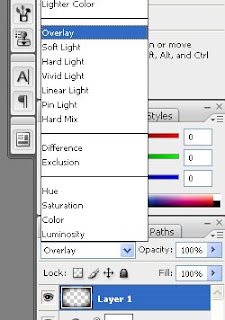
Depending on how the vignette looks you can copy the layer (Ctrl+j) to increase or lower the opacity to decrease the effect of the vignette. Here I copied the vignette to strengthen it a bit.
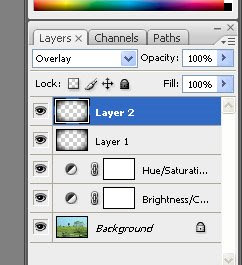
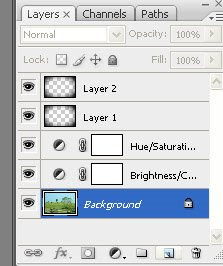
Now select the photo layer (background) and create a new layer (will be inserted directly above the background layer).
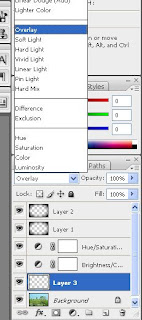
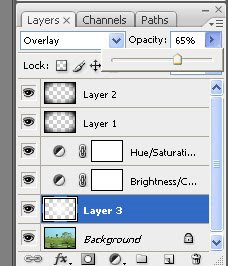
Change this layers blend mode to opacity the same way as the vignette.
Check to make sure your foreground color is white. If not select default colors in the toolbox (shortcut d) and switch the color (shortcut x) to make white the foreground color.
From the toolbox select the gradient fill. If it's not immediately visible in the toolbox you can right click with the mouse on the paint bucket to show the menu.
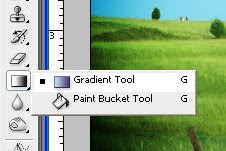
With the gradient fill tool selected you can now select radial gradient from the options bar. Clicking the drop down arrow next to the style select the foreground to transparent type. Note if your foreground color is anything but white this is the color that will show up here too so make sure you set the right color ;-)
 |  |
If the vignette is still selected deselect it using the deselect from the select menu or using the Ctrl+D shortcut.
With the gradient tool click in the middle of the photo and drag the line to any of the edges.
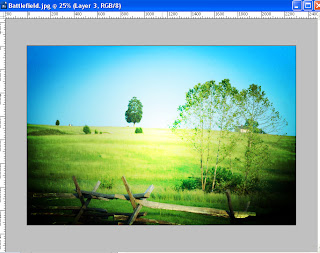
If the result seems a bit too much you can lower the effect by lowering the opacity of the layer. It should be bright but not a shining white center.
And there you have your finished Lomo photo with strong contrast, saturation and vignette. I kind of like the saturation in these photos and it just seems so straight forward that it is hard to believe :-)
Ohh yeah if your photo needs adjustments, and may I add that's exactly why we are using adjustment layers, you can adjust the vignette by copying a vignette layer to make it stronger or adjust the opacity of the topmost vignette layer to lessen it and you can adjust the layer above the background layer to control the brightness of the photo.
 |  |
A couple of extra shots
Here is a couple of extra shots I applied the effect to.
 |  |
Have fun and ... don't think about it ;-)
Additional information
http://www.lomo.com/
http://www.lomographic.net/.
http://williamburdette.net/lomography/
3 comments:
Hi, I'm a dork and playing around with photos tonight...
when I apply the gradient tool it's directional. How did you get yours circular/centered?
ah, nevermind... I just found the little buttons to switch from linear to radial! :)
PS. You should do some more tutorials... seriously, this week I figured out layers. And mostly from your posts! :)
Post a Comment