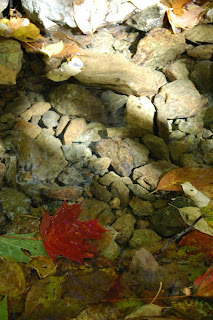
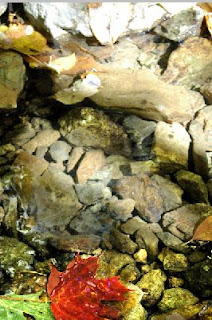
The photo I am using in this tutorial is of a leave in a stream from the fall time in the mountains. I originally picked this one and wanted the red color to really stand out. So not only did I want to make the color pop out of the photo but also enhance the saturation to make it really stand out.
The leave being in a stream partially covered by water helped in creating some glossy reflections which I enhanced.
So here goes the tutorial starting out with a somewhat ordinary photo.
When I first started out with photoshop I created changes directly in the photo (background layer). This worked out ok but as some knows it does make changes to the actual pixels and changing parameters later is rather difficult (i.e. impossible).
Instead of making changes in the background layer I will be using adjustment layers and for this particular one where I want to make multiple adjustment layers but limit them to part of the photo I will create them in a group (don't worry it's not that difficult).
To create a layers group simple click the folder icon in the layers palette
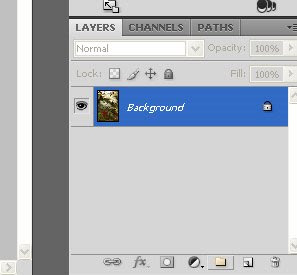
Before adding anything else make sure that the new group is selected in the layers palette. This will ensure that the new adjustment layers you are creating end up inside the group.
In this particular photo I want to increase the brightness of my target area a little bit. To do that I am as the first step adding a Brightness/Contrast adjustment layer to the group. With the group selected add the adjustment layer via the adjustment layer menu and apply the brightness needed for your photo. Here I increased brightness with a value of 35.
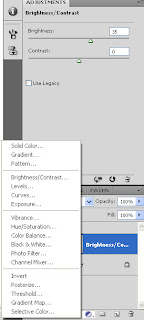
Next I want to add the color effect to my target area (the leaf). There are several ways to do this but here is one of them. As the first step I am adding a channel mixer layer (I know it sounds weird to do that to increase saturation but hang in there for a sec).
Here you will have to adjust the values depending on the color that's in your photo. For this particular case I have the red color I want to pop out and some green.
First off I set a check mark in 'Monochrome' (this I guess is the "weird" part) and adjust the output to boost my colors with the following settings: red: 190% and green: 90%.
This will most likely blow out everything in the photo so I adjust it to keep details in my target area by setting the constant to -20%.
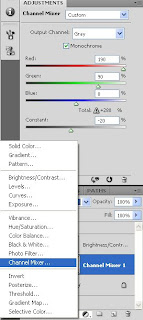
As you can see there isn't really any colors popping anywhere... It's a very bright black and white but this is the point where... hmm... just go with it. It will be fine ;-)
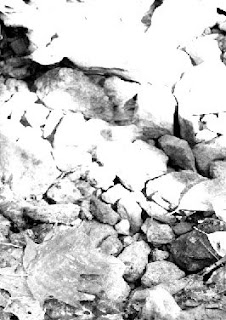
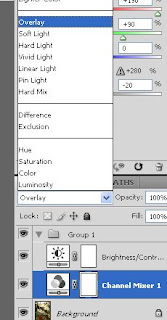
To make the Channel Mixer layer pop the colors rather than turn everything black and white I am changing the blending mode of the layer to overlay. You do this by selecting the layer in the layers palette and select Overlay from the blend mode drop down.
And there you have it. Talk about colors that pop out in a sort of painterly way. It's kind of a weird way of doing it but I like the effect where the colors are not "just" boosted but the contrast and shades really get to play around and create a somewhat special look.
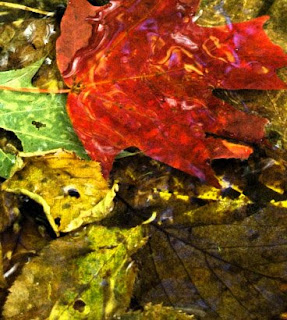
Chances are that the adjustment layers will "blow out" some areas of the photo as it is the case with my example here. Since my goal is to get the adjustment and color just for a small area I am not concerned with the actual color of other areas and can remove them.
To adjust the effect of the adjustment layers I am using a layer mask on the entire group. If you don't already have a layer mask on the group layer. Select the layer and click the "Add vector mask" icon in the layers palette.
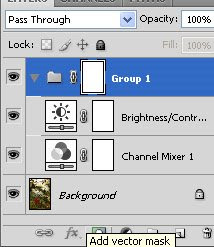
Select the mask in the group layer and start painting (with the paint brush) black in the areas where you want to hide the effects.
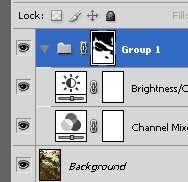
After applying the mask to the group the photo is more balanced while still having the popping colors in the target area (the leaf).
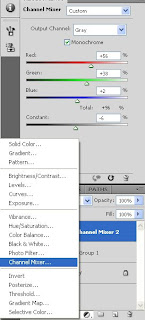
To "convert" the photo to black and white I add yet another "Channel mixer" adjustment layer. Make sure the group layer is selected and click "Channel Mixer" from the add adjustment layer menu in the layers palette. This will add the adjustment layer above the group and make it independent of the mask applied to the group. Note alternatively you could use a "black & white" adjustment layer for this step.
The goal with this layer is to create a balanced black & white photo. The values used highly depend on the photo you are "converting". Start out by setting a check mark in the "Monochrome" check box and adjust values according to your photo.
For this particular photo I used the values: Red 56%, Green 38%, Blue 2% and a Constant -6%.
To get the target to show through the black & white conversion layer add a layer mask and color the target area black in the mask.
If you have a stylus this may be easier done as creating a mask with a mouse can be tricky at times.
You can start out by using the Lasso tool to make a selection around your target area and fine tuning it using the quick mask function and painting in your selection (make a loose selection with the lasso tool and press Q to switch to quick mask mode. With a brush paint black in the photo to add to the selection and white to subtract).
With a selection in your photo click the add vector mask in the layers palette and your mask is created based on the selection.
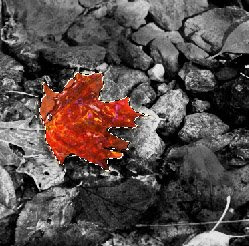
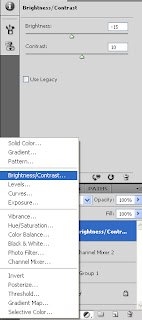
If your photo is still too bright or too dark you can add a Brightness/Contrast layer on top of the entire layers stack. This will adjust the brightness and contrast for the entire photo.
In this example I wanted to darken the entire composition a bit and increase the contrast. To do that I added a Brightness/Contrast adjustment layer (with the top layer selected to ensure my new adjustment layer is on top) with the values: Brightness -15 and Contrast 10.
And now we are done. Below you can compare the before and after.
 |  |
Hope you liked the tutorial and please do feel free to drop a comment in case you have any questions or such :-)
No comments:
Post a Comment