Monday, March 31, 2008

Salted paper prints

Once again I am going back in time to wayyyy before the invention of photoshop. Well before computers and modern stuff like running water and toilets.

Salted prints as described by the Library of Congress are the earliest photographic prints made on paper. The image seems to be in the paper, not resting on the surface since the fibers are noticeable and seem to be part of the image.

View some examples online from the Library of Congress :-) very nice collection they got there...

I might add that the salted prints were generally used from ca. 1840- ca. 1860. And events such as the 4th of March 1861: Inauguration of Mr. Lincoln can be found in the online library... If that doesn't impress you here is a link to toys'r'us they got free shipping when you spend too much money on items you don't need ;-)

Soo to get started on this little adventure in old style photos. Pick out a photo you would like to use. Just to be really sure you my want to work on a copy ;-)

I picked out this one from Shenandoah from my trip out there in March (read more)


First step duplicate the background layer using the new layer from the layers menu or press CTRL+J.
With the new layer selected apply the "find edges filter" from the filter menu Stylize->Find edges.


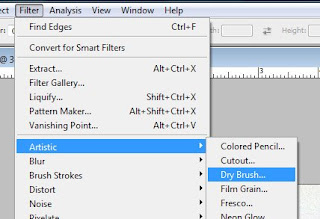
With the same layer selected apply the "Dry Brush" filter found in the filter menu Artistic->Dry Brush...

In the Dry Brush dialog use the following settings: Size=1, Detail=7 nd Texture=3.

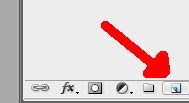
Finally change the blend mode of the layer to Overlay and adjust the opacity to 25%. Both settings are found in the layers palette.


To increase contrast and get everything nice and crips (almost too much but this is an old technique we are doing) add a curves adjustment layer using the adjustment layer button in the layers palette.

For the curves layer apply a high contrast S curve. Do this by selecting high contrast in the preset menu or simply grab the line about 1 square in from the left and drag that down a bit and grab the line about 1 square in from the right and drag that up a bit forming an S curve.


Add another adjustment layer this time a levels layer (using the adjustment layer button in the layers palette) and drag the middle (gray) triangle to the right until it has the value 50 (or just type 50 in the middle text box).


Now for some texture in the photo... Add a new layer using the new layer button in the layers palette.


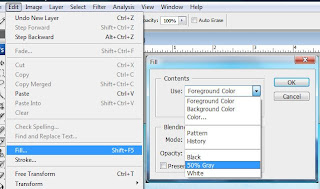
Fill the new layer with 50% gray using the Fill method found in the Edit menu. In the fill dialog change the content to use 50% gray.

To actually create the texture add a Grain filter. This is found in the filter menu Texture->Grain filter. In the grain filter dialog select Clumped grain and set intensity=33 and Contrast=50.


On the same layer apply a glass filter found in the filter menu Distort->Glass and use the settings: Distortion=18, Smoothness=7 and texture=frosted.


To finish off the texture layer set the layers blend mode to Pin light (from the drop down in the layers palette).

To get the coloring of the photo to resemple that of an old-time salt print add a Hue/Saturaion adjustment layer using the add adjustment layer button in the layers palette. In the dialog start by setting a check mark (select) the Colorize option. Then set Hue=7, Saturation=22 and keep Lightness =0.

Now we will need a second texture layer. Start this by adding a new layer using the add layer button from the layers palette.
As with the previous layer fill the layer with 50% gray using the fill function from the Edit menu.


Once again add a grain filter to the layer but this time use the following settings: Grain type=Vertical, Intensity=2 and Contrast=50. Finish off the layer by setting the layers blend mode to Vivid light.


For a couple of finishing touches select the first texture layer (above the levels layer) and select the highlights using the Color range dialog found in the Select menu. In the dialog change the Select option to Highlights.

Fine-tune the selection by feathering the selection by 12 pixels. Select Feather from the Select->Modify menu and enter 12 in the feather selection dialog.

Once the selection is feathered (and this is the magic portion) hold down the Alt key and add a layer mask (the black button with the white circle in the lower part of the layers palette). This will create a layer mask keeping the highlights free of the texture on the initial texture layer.

If you are not entirely happy with the result and the contrast seems wayyyy to harsh you can adjust this by adjusting the 'S' curve in the curves layer (double click the layer icon in the layers palette).

Here is the finished result :-)

Friday, March 28, 2008

"Artistic" collage

Yeah almost weekend... and finally here is a good little weekend project.
Well depending on how many photos you have it may take more than a weekend but it's not really *that* difficult once you get the hang of it :-)
Soo here are a little show and tell on how to make a collage with "artistic" edges.

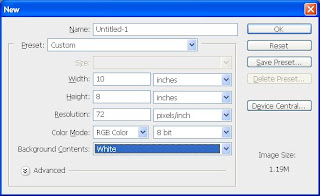
Start out by creating a new document in the size you want to print the final work in. I have selected a 8 by 10 since it gives room to put decent sized photos in and fits my printing format.


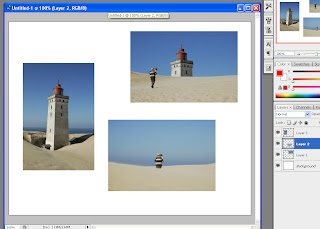
Now open each photo you want to add to the collage. Select everything (CTRL+A) and drag the content (with the arrow tool) to the collage. After dragging each photo into the collage place it in the area where you want it and change the size so it "fits". You can easy change the size with free transform (from the layers menu or CTRL+T) just remember when resizing you can press and hold shift before starting to change the size to keep the same aspect ration (people don't get tall and skinny or short and fat... well unless... you know)...


Here I have placed three photos within my collage and placed them just about where I want them to end up.


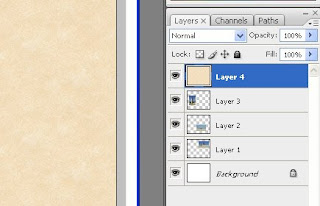
Select the top layer in the layers palette and add a new layer. This will be the collage background layer in which we will add some texture and punch holes (sounds fun doesn't it?)


Select the paint bucket from the toolbox (may be hidden behind the gradient fill depending on what you used last but then just right click it and select the paint bucket).
From the toolbar click the drop down arrow in the fill selection box and choose pattern.


The default patterns may not offer exactly what you were looking for so you can create your own (maybe this should be covered later) or load another predefined pattern selection.
To get to this point expand the pattern selection (little arrow again) which will give you a view of the currently loaded patterns. Select on of these or click the next little arrow (upper right hand corner of the pattern window) and select the pattern package you want.
In this case I selected Color paper and went with a pale color.


With the top layer selected click in the collage to fill the entire thing with your selected pattern. Should it not be to your liking you can undo this (CTRL+Z) and select another pattern. It's fun try some different ones depending on the photos you have selected.

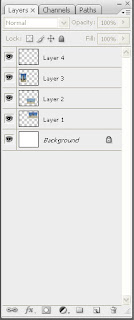
As you most likely noticed the photos you dragged into the collage each resides on a different layer. You could merge all the photo layers to make the selection slightly easier but well you could also just leave them :-)
But to punch the holes in the collage you need a selection to do this by. The easy way is to hold down CTRL and click the thumbnail of the first photo. This will create a selection based on that photo. But we will want to add a selection for the rest of the photos as well.
To do this hold down CTRL+SHIFT while you click the thumbnail of photo 2, 3, 4 etc.
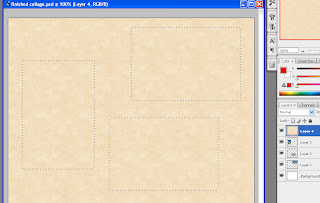
Once done with all of them you should have a selection that reflects all of your photos like this:

Now invert the selection (CTRL+I) and with the top layer (the collage background) selected add a layer mask (the little gray button with a white circle in the layers palette). and wawooom look at that. Pretty cool huh? But yeah I know. I was talking about some "artistic" edges and this looks nothing like it does it?

To make the edges of the photos a little "artistic" we can rough them up a bit by modifying the layer mask (and this is where it pays off having a layer mask rather than using the eraser. The layer mask doesn't alter the photo in anyway so it can always be undone).

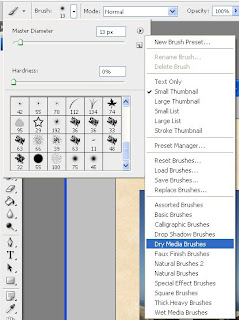
Select the brush from the toolbox and change the brush tip by clicking the little drop-down arrow in the toolbar next to the current one (a little round tip with a number under it).
Here you can select from already loaded brush tips but let's go ahead and make it "artistic". Click the little arrow in the top right hand corner of the brush tip dialog and select a new brush tip category. In this example I selected the Dry Media Brush to get that slightly rough look.

When selecting a new brush set you will be asked if you want to replace the existing ones. and well no it doesn't throw out and delete the old ones but replaces them within photoshop. You can either Append the new brush set (you may end up with a lot of brush tips loaded) or just select ok to just view the brushes in the set you selected. You can always load the old brushes the same way and select Basic Brushes from the list :-)
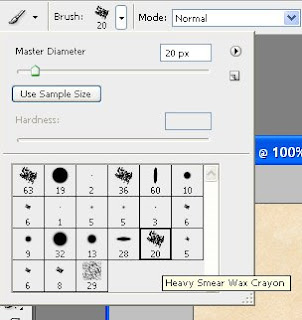
With the new brush set loaded select a brush tip you think will work. I choose the Heavy Smear Wax Crayon since well... remember we are going "artistic" ;-)

Now select the layer mask in the layers palette (the black and white thumbnail). Position you brush at one corner of the photo where you want to add the "artistic" edge outside the photos borders so it roughly would cover half the brush width into the photo. Before you draw click and hold the SHIFT key (ensures the line is always straight) click and hold left mouse button as you draw along the edge. If it doesn't turn out right on the first try undo (CTRL+Z) and try again. I just know you can do it :-)
Do that to all the photos you have inserted (remember to work on the mask not the actual photos) and you will in no time have this one ready to print and frame.


Have fun :-)

Making a collage

Well finally I got around to it after the last round of travel photos from DK (http://jackidyrholm.blogspot.dk).

Using a template or well template like photoshop in yep you guessed it photoshop isn't that difficult. Getting the "right" template can be difficult at times since it can be a big file or one that's hard to modify.

Anyway I hope you find this one easy.

Here is a template for you to download and then I will show how to use it.


Download here.


Start out by opening the template and you background image in photoshop. Select the template window and the background image layer in the layers palette.


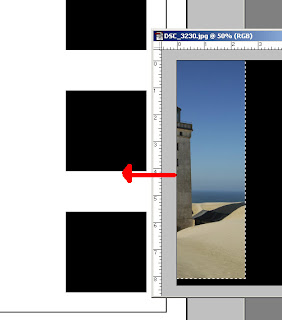
Select everything in your background image CTRL+A and use the arrow pointer (shortcut v) to move the image to the template.

Once the background image has been moved to the template you can adjust the position of the background image by moving it or adjust the size of it with free-transform (shortcut CTRL+T). If you are changing the size of the image it's usually a good idea to hold the shift key while dragging the corner. This will ensure the image keeps the same aspect ratio and the image doesn't come out as distorted.
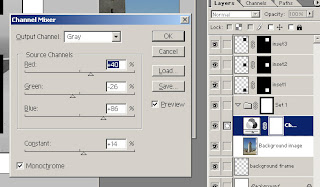
If you don't want the background image to be black and white simply hide that layer by clicking the eye next to it. Otherwise double click the three bubble icon on the black and white layer to adjust the channels to what gives you the best black and white. Everything is shown real time so don't be afraid to experiment :-)

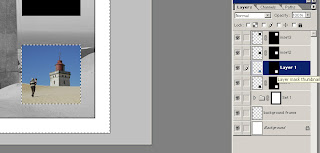
Now for the insets along the side. Select the inset layer in the template, open the photo you want to insert and either do a selection of part of it or just select all. Use the arrow point to once again drag the photo to the template and you will have it (sort of) inserted in the template.

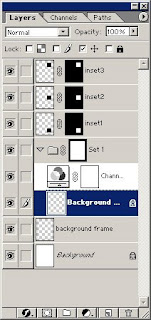
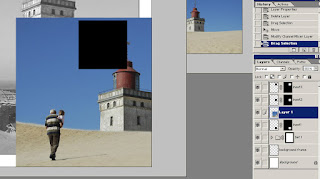
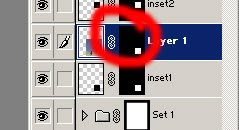
First apply the mask to the photo layer that was just created. This you can do by holding down the CTRL key while clicking the mask on the inset layer. Doing this will give you a selection (marching ants) . Select the photo inset layer (the one we just dragged in) and click the mask icon in the layers palette (the gray one with a white circle in the middle).

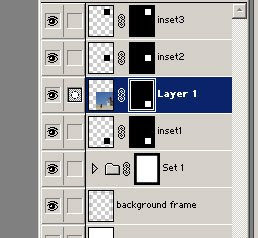
Now before starting to move or resize the inset photo be sure to first select the layer you wish to work with and disable the link between the photo and the mask. If the link is enabled while resizing the photo the mask will change the same way and that's not really what we want in this case.

Now that the link is disabled select the photo icon (not the mask) from the inset layer and choose free transform from the layers menu (or shortcut CTRL + T). Hold down shift and drag a corner to get the fit you like the best. Note that you may have to let go of the mouse button and shift to move the photo while doing the resize.
Once you are done moving and resizing your photo inset select the inset area by holding down CTRL and click the mask then invert the selection by choosing invert from the selection menu (or shortcut CTRL + SHIFT + I). Delete/clear all non visible photo using the delete key (not backspace).

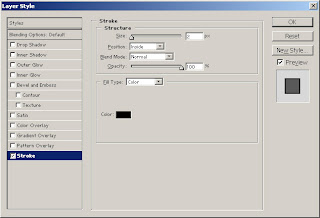
Now add a stroke (no it's really not a bad thing) by double clicking an empty area next to the layer text or selecting stroke... from the layer style menu in the layers palette (click the black round button with a white f). Depending on the size of the photo and resolution you may need a different size but try starting with a size of 2px, position: inside and black for color.

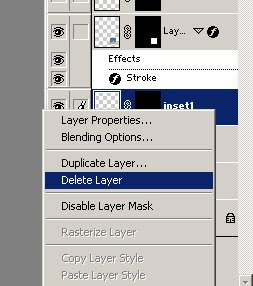
Now your first inset is done and you can delete the "old" inset1 layer which isn't going to be used. Also if you are going to come back to move the insets around or resize them it's a great idea to remember to re-enable the link between the photo and the mask.

Now you can go ahead and insert photos in the rest of the insets. Once done and having remembered to enable the link between the photo and the mask you can also move the insets around to a position that may look better than what I came up with. Anyway I ended up getting this:

soft focus portraits

If you are using photoshop and have a number of changes you go through every time you get a nice portrait photo it just may be time to learn about photoshop actions.
If you already know about actions but have a hard time getting it just right or just want an action to plug in and ready to go...

Well here it is :-)

Browsing the net using google or your favorite search engine you can find plenty of free actions out there and many are free :-)

For portrait photos I have a good one here which gives a nice soft focus which you can easily adjust before finalizing the photo.

You can download it here.

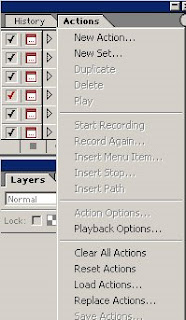
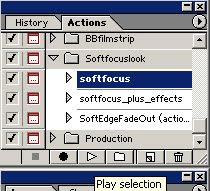
Start by downloading the file and "install" it in photoshop. You can do this by switching to your actions palette. If it's not visible go to the window menu and click "Show actions".
Now you can drag the downloaded action file to the action palette or click the arrow in the action palette and select load action.


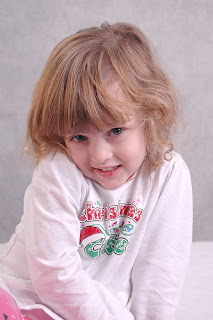
Now select a photo to use the action with. I got this one out of the pile...


Select the action from the actions palette and click the play button.


All there is to do is follow the instructions given. As an example there is a blur step which asks you to select a a value that fits your photo.
This value will depend on the photo size and in my case the best option was a bit under the average of 5.


and before you know it you are done :-)

OriginalSoft focus


I don't know about you but if I can do stuff this easy... why use more time on it :-)

Have fun with it...

Sketchy...

Here is a little quick way (other than using photocopy plugin) of creating a sketch from your photo.

Start with a photo like this one:

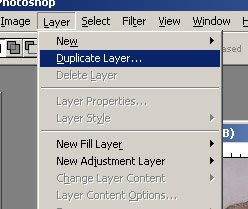
Create two duplicate layers using either "Duplicate Layer..." from the Layer menu or select your background layer and press CTRL+J twice.

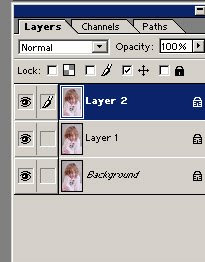
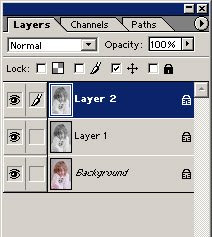
Your layers palette should now look like this with the background layer and two copies.

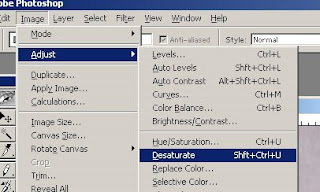
Desaturate both the copies using the "Desaturate" function from the Image->Adjust menu (or SHIFT+CTRL+U).

After which your photo goes black&white and your layers palette looks something like this.

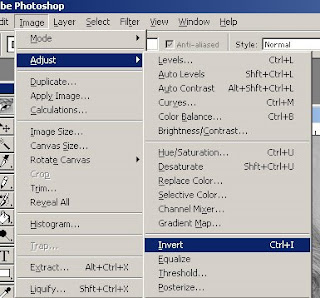
Select the top layer and invert the content using the "Invert" function from the Image->adjust menu (or CTRL+I).

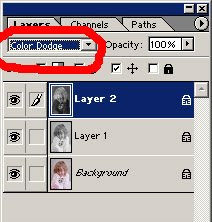
Select your inverted top layer (or make sure it is selected) in the layers palette and set the blending mode to "Color Dodge". This will make your photo look all white but that's ok. Don't worry it's normal ;-)

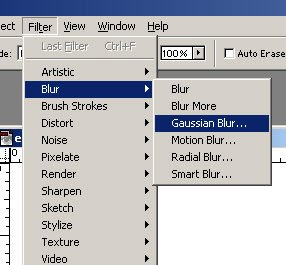
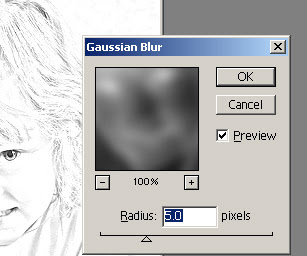
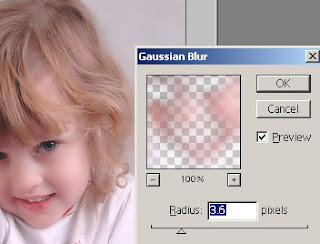
Again with the top layer selected in the layers palette apply a "Gaussian Blur..." by selecting it from the Filter->Blur menu.

Depending on the size and resolution of your photo select a radius that seems right. The higher radius you select the more detail will show up and the less it will look like a sketch.

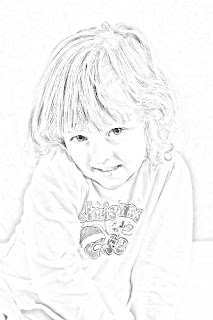
Here is the final result:
OriginalSketch