The good news is that HDR (see a longer explanation here) can be used to increase the dynamic range in a photo to capture more details that otherwise would be hard to include in the photo.
Granted this can all be overused but as with anything else... in moderation it's awesome :-)
Doing HDR the "correct" way is of course capturing photos with different exposures to draw out details in the various areas of the photo.
However what if you got one photo and at the time didn't get a set of photos?
Here I will show you how you can use 1 photo (captured in camera raw format) to generate a HDR photo using Adobe Lightroom and Photo matrix (other tools can be used too).
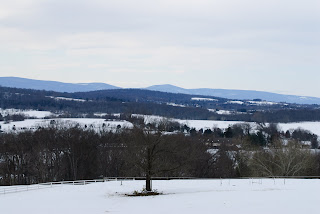
Starting out with this photo (which I btw. shot out the window of the car).

In Adobe Lightroom select the photo and create two virtual copies of the photo. You can do this by right clicking the photo and selecting "Create Virtual Copy" or selecting the same from the Photo menu (ohh yeah do this twice to create two virtual copies).

Select the first virtual copy and decrease the exposure 1 stop (the double left arrows)

Select the second virtual copy and increase the exposure 1 stop (the double right arrows)

Now you have three photos where one has an exposure as captured by the camera. One is underexposed by one stop and one is overexposed by one stop.

Now you can export the photos to finish the HDR in photo matrix or select the photos and select to create HDR with Adobe Photoshop (found in the edit menu).
I have here exported the photos and selected them for processing in Photomatrix (click generate HDR and select the files).

Once the files have been selected you may have to set the exposure differences manually.

Since the photos are all based on one capture there are no need to align the photos or attempting to reduce ghosting (nothing has moved in the photo between "captures").

Now the image displayed may not look "right" since it has not yet been processed. By hovering over the image you can see a preview of the expected result though.
This step I just skip right to the part of clicking "Tone Mapping" which is where step 1 of the magic is going on.

After Tone Mapping there is a pretty good preview of what to expect. Generally Photomatrix is doing the automatic settings pretty good so I don't even try to fine tune unless there is something that "sticks out".
Continue to part 2 of the magic and click Process.

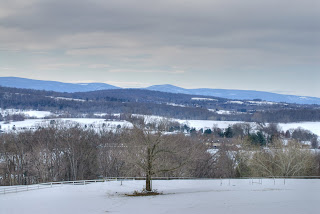
All there is left to do now is save the photo and here is my final result which is created with a single photo (captured with camera raw).
Granted this is not the "correct" way to do it and creating it with a real capture where individual photos has been captured with different exposures will reveal/capture details that may have been lost in a single capture (darkest/lightest areas missing details).
However for a polishing of a single photo I think this is pretty decent :-)
